Photographers face a challenge in night photography due to glints caused by light interactions with surfaces. To minimize these glitches, they must strategically select camera positions during twilight hours, understanding light behavior and choosing angles to soften reflections. The most effective mock camera locations for glint detection tests should replicate diverse real-world conditions, incorporating natural and man-made light sources and reflective surfaces. Cutting-edge software using machine learning analyzes visual data to identify subtle reflections, determining optimal camera positions for sharper night images. To achieve best results, strategically place mock cameras mimicking real-world conditions, fine-tune algorithm parameters based on gathered data, and regularly update the model with fresh datasets.
In the realm of night photography, capturing stunning images without unwanted lens glints is a delicate art. This guide delves into the most effective methods for detecting and mitigating lens glints during nocturnal shoots. We explore the impact of glints on your photographs and provide insights into choosing optimal mock camera locations to minimize their occurrence. Furthermore, we dissect the technical aspects of glint detection software and offer strategies for testing and optimizing your setup for professional-grade results.
- Understanding Glint and Its Impact on Night Photography
- Choosing the Right Mock Camera Locations
- Technical Aspects of Glint Detection Software
- Testing and Optimizing Your Setup for Best Results
Understanding Glint and Its Impact on Night Photography
Glints, those fleeting moments of sparkle and reflection in night photography, can significantly impact the visual appeal and overall quality of your images. They are caused by light sources like street lamps, car headlights, or even moonlight interacting with specific surfaces, such as wet roads, puddles, or shiny objects. While these reflections might add a dynamic element to daytime photos, they can become a photographer’s nightmare during low-light conditions, often appearing as unwanted artifacts that detract from the main subject. In night photography, where lighting is already limited, glints can make it challenging to capture clear and well-exposed images.
Identifying the most effective mock camera locations plays a crucial role in minimizing these glitches. By understanding how light interacts with various environments during twilight hours, photographers can strategically choose settings that reduce glint effects. For instance, positioning your camera to avoid direct light sources or finding angles where reflections are softened by nearby objects can help mitigate glints. This requires an intimate knowledge of the area and a keen eye for detail—a skill set that every night photographer should strive to develop.
Choosing the Right Mock Camera Locations
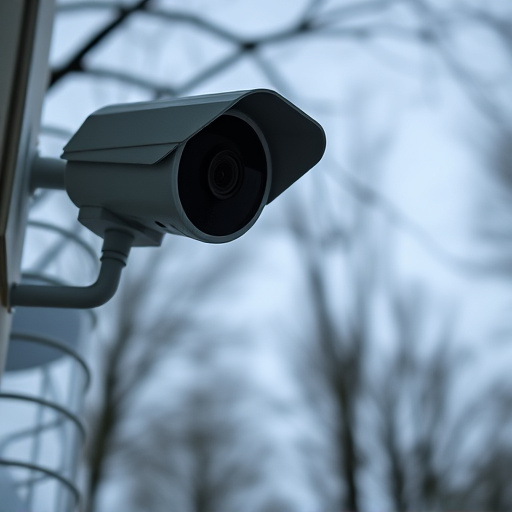
When selecting mock camera locations for night-time glint detection tests, it’s crucial to consider factors that mimic real-world conditions as closely as possible. The most effective mock camera locations should offer a diverse range of environments, from urban areas with bright streetlights to remote landscapes with minimal artificial lighting. Look for places where natural and man-made light sources are varied, allowing for a broader understanding of how glints appear under different circumstances.
Opting for locations with a mix of reflective surfaces like water bodies, glass structures, or metallic objects can further enhance the realism. These elements contribute to the complexity of glint patterns, enabling more accurate detection algorithms. Additionally, choosing spots that provide clear lines of sight without excessive obstructions ensures consistent and precise measurements during testing.
Technical Aspects of Glint Detection Software
The software behind glint detection in night photography is a complex blend of machine learning and computer vision algorithms. These systems are designed to analyze vast amounts of visual data in real-time, identifying subtle reflections (glints) that might go unnoticed by the human eye. The process involves several technical steps, including edge detection, noise reduction, and contrast enhancement. By simulating various camera positions and orientations, researchers determine the most effective mock camera locations for optimal glint capture, enhancing overall image clarity. This iterative approach ensures the software can adapt to different lighting conditions and surface angles, making it a robust tool for professional photographers aiming to achieve sharper night-time images.
Testing and Optimizing Your Setup for Best Results
When testing and optimizing your camera lens glint detection system for the best results, selecting the most effective mock camera locations is crucial. Place your mock cameras in areas that mimic real-world scenarios, considering factors like lighting conditions, angle of incidence, and potential obstructions. This could involve positioning them near windows, under streetlights, or within complex urban landscapes to ensure your detection algorithm performs well across diverse environments.
Optimizing involves fine-tuning parameters based on data gathered from these tests. Experiment with different sensitivity settings and glint threshold values to balance false positives and negatives. Regularly update your model with new datasets to adapt to changing conditions and maintain peak performance, ensuring accurate glint detection in various night-time settings.
Camera lens glint detection in night photography is a powerful tool that, when utilized effectively, can significantly enhance image quality. By understanding the impact of glint, strategically choosing mock camera locations, and mastering the technical aspects of glint detection software, photographers can achieve remarkable results. Testing and optimizing their setup ensures they capture sharp, detailed images with minimal glare. In terms of the most effective mock camera locations, diverse environments allow for a broader understanding of glint’s behavior, making it easier to adapt techniques for various scenarios. Ultimately, this method revolutionizes night photography, enabling professionals and enthusiasts alike to produce stunning visuals that capture the essence of darkness.